How to Make Delicious Chocolate Easter Nests: A Fun and Easy Recipe for the Whole Family
Easter is a time for celebration, family gatherings, and, of course, delicious treats! One of the most iconic Easter treats is the Chocolate Easter Nest. These adorable, edible nests are not only a joy to make but also a delightful way to celebrate the season. Whether you’re looking for a fun activity to do with your kids or simply want to create a festive dessert, this Chocolate Easter Nest recipe is perfect for you. In this post, we’ll walk you through the step-by-step process of making these delightful treats, share tips for perfecting them, and explore why they’re such a hit during Easter.
Why Chocolate Easter Nests Are a Must-Make This Easter
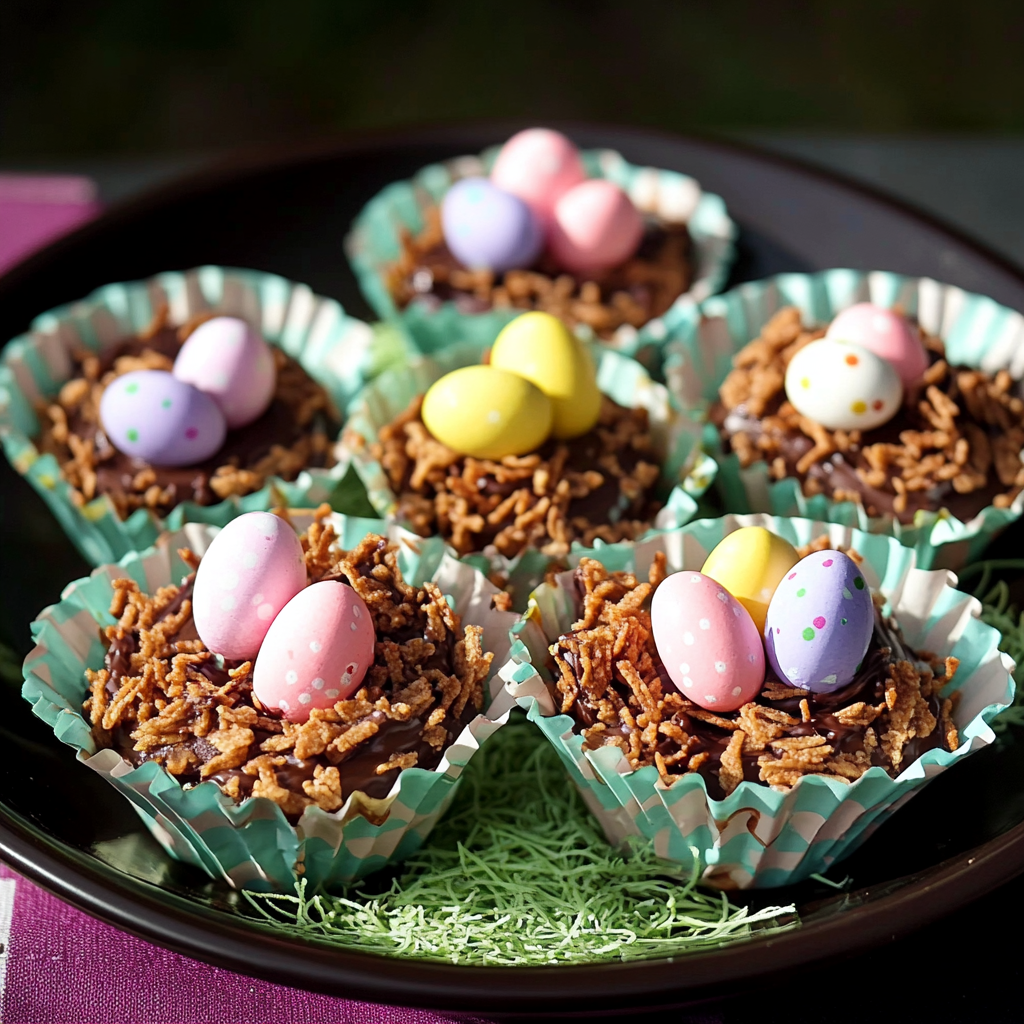
Chocolate Easter Nests are a classic Easter treat that combines the richness of chocolate with the crunch of cornflakes or rice crispies, topped with colorful mini eggs to resemble bird nests. They’re easy to make, require minimal ingredients, and are a fantastic way to get kids involved in the kitchen. Plus, they’re customizable—you can add your own twist with different toppings or decorations.
The best part? These nests are not only delicious but also visually appealing, making them a great addition to your Easter table or as gifts for friends and family. Let’s dive into the recipe and learn how to make these delightful Chocolate Easter Nests.
Chocolate Easter Nest Ingredients
Before we get started, let’s gather all the ingredients you’ll need. This recipe is simple and uses items you can easily find at your local grocery store. Here’s what you’ll need:
- 500g of milk cooking chocolate (you can also use dark or white chocolate if preferred)
- Cornflakes or rice crispies (about half a packet, or enough to coat the chocolate)
- Mini eggs (for decoration)
- Optional: Shredded coconut and green food coloring (to create edible “grass”)
- Small cupcake cases (to hold the nests)
Step-by-Step Instructions for Making Chocolate Easter Nests
Step 1: Prepare the Coconut Grass (Optional)
If you’re using shredded coconut to create edible grass, this is the first step. Here’s how to do it:
- Take a small bowl and add your shredded coconut.
- Add a few drops of green food coloring.
- Stir vigorously until the coconut is evenly colored. This will give your nests a festive, grassy look.
Tip: If you don’t have shredded coconut, you can skip this step or use green sprinkles for a similar effect.
Step 2: Melt the Chocolate
The key to perfect Chocolate Easter Nests is properly melted chocolate. Here’s how to do it:
- Break the chocolate into small pieces and place them in a large microwave-safe bowl.
- Microwave the chocolate in 30-second intervals, stirring after each interval, until it’s completely melted. Be careful not to overheat, as this can cause the chocolate to seize or burn.
UPDATE: If you’re like me and have a tendency to burn chocolate in the microwave, I highly recommend using a bain-marie (double boiler) instead. Simply place the chocolate in a heatproof bowl over a pot of simmering water, stirring until melted.
Step 3: Mix the Chocolate and Cornflakes
Once your chocolate is melted, it’s time to add the cornflakes or rice crispies:
- Gradually add the cornflakes to the melted chocolate, stirring gently to ensure they’re evenly coated.
- If the mixture seems too runny, add more cornflakes until the chocolate is fully absorbed and the mixture holds together.
Tip: For a fun twist, you can mix in other cereals like shredded wheat or even crushed biscuits for added texture.
Step 4: Assemble the Nests
Now comes the fun part—shaping your Chocolate Easter Nests:
- Line a muffin tin with small cupcake cases.
- Using a spoon, scoop the chocolate and cornflake mixture into the cases, pressing down gently to create a nest shape.
- If you’re using coconut grass, sprinkle a small amount on top of each nest.
Step 5: Add the Mini Eggs
No Chocolate Easter Nest is complete without mini eggs! Here’s how to finish them off:
- Place 2-3 mini eggs in the center of each nest.
- If the eggs aren’t sticking, add a small drop of melted chocolate to secure them in place.
Step 6: Let Them Set
Once your nests are assembled, it’s time to let them set:
- Place the nests in the refrigerator for at least 1-2 hours, or until the chocolate has hardened.
- Once set, they’re ready to serve!
The History of Chocolate Easter Nests
The tradition of making Chocolate Easter Nests dates back several decades and is deeply rooted in Easter celebrations. These edible nests are more than just a treat—they symbolize new life and rebirth, which are central themes of the Easter season. The use of chocolate, eggs, and nest-like shapes ties into the broader symbolism of Easter, where eggs represent fertility and new beginnings, while the nest signifies a safe haven for new life.
The concept of edible nests likely originated in Europe, where Easter traditions often involve baking and crafting. Over time, the recipe spread to other parts of the world, becoming a beloved activity for families during the holiday. The simplicity of the recipe—combining melted chocolate with cereal and topping it with mini eggs—made it accessible to home cooks of all skill levels. This ease of preparation, coupled with the festive appearance of the nests, contributed to their enduring popularity.
In recent years, Chocolate Easter Nests have evolved to include various adaptations. Some bakers use shredded wheat or rice crispies instead of cornflakes, while others experiment with different types of chocolate, such as dark or white chocolate. The addition of coconut grass or colorful sprinkles has also become a popular way to enhance the visual appeal of the nests. Despite these modern twists, the core essence of the recipe remains the same: a fun, family-friendly treat that celebrates the joy of Easter.
The tradition of making these nests is not just about the end product but also about the process. For many families, creating Chocolate Easter Nests is a cherished activity that brings everyone together in the kitchen. It’s a time to bond, share stories, and create memories that last long after the last nest has been eaten. Whether you’re continuing a family tradition or starting a new one, making these nests is a wonderful way to celebrate the season.
Tips for Perfecting Your Chocolate Easter Nests
While making Chocolate Easter Nests is relatively straightforward, a few tips and tricks can help you achieve the best results. Here are some expert suggestions to ensure your nests turn out perfectly every time:
- Choose the Right Chocolate: The quality of your chocolate will significantly impact the flavor of your nests. Opt for high-quality cooking chocolate, whether it’s milk, dark, or white. Avoid using chocolate chips, as they often contain stabilizers that can affect the melting process.
- Melt Chocolate Carefully: Melting chocolate can be tricky, as it’s prone to burning. If using a microwave, heat it in short intervals and stir frequently. For a more controlled method, use a bain-marie (double boiler) to melt the chocolate gently over simmering water.
- Balance the Ratio of Chocolate to Cereal: The key to a good nest is the right balance between chocolate and cereal. Too much chocolate, and the nests will be overly rich and messy; too little, and they won’t hold together. Start by adding cereal gradually until the mixture is well-coated but not overly dry.
- Use Fresh Ingredients: Stale cereal can affect the texture and taste of your nests. Ensure your cornflakes or rice crispies are fresh and crispy for the best results.
- Get Creative with Decorations: While mini eggs are the classic choice for topping your nests, don’t be afraid to experiment with other decorations. Jelly beans, sprinkles, or even edible flowers can add a unique touch to your creations.
- Let Them Set Properly: After assembling your nests, allow them to set in the refrigerator for at least an hour. This ensures the chocolate hardens properly, making the nests easier to handle and serve.
By following these tips, you’ll be able to create Chocolate Easter Nests that are not only delicious but also visually stunning. Whether you’re making them for a party or as a fun activity with your kids, these nests are sure to be a hit.
Fun Variations of Chocolate Easter Nests
One of the best things about Chocolate Easter Nests is their versatility. While the classic recipe is always a winner, there are countless ways to put your own spin on this beloved treat. Here are some fun variations to try:
- Dark Chocolate Nests: For a richer, more intense flavor, use dark chocolate instead of milk chocolate. This variation is perfect for those who prefer a less sweet treat.
- White Chocolate and Cranberry Nests: Swap out the milk chocolate for white chocolate and add dried cranberries to the mix. The tartness of the cranberries pairs beautifully with the sweetness of the white chocolate.
- Peanut Butter Nests: Add a spoonful of peanut butter to the melted chocolate for a nutty twist. Top with mini peanut butter cups instead of mini eggs for an extra indulgent treat.
- Gluten-Free Nests: Use gluten-free cereal, such as gluten-free rice crispies, to make your nests suitable for those with dietary restrictions.
- Vegan Nests: Make your nests vegan by using dairy-free chocolate and vegan mini eggs. You can also substitute honey with maple syrup if your recipe calls for it.
- Colorful Nests: Add a few drops of food coloring to the melted chocolate to create vibrant, colorful nests. This is a great way to make your treats stand out at an Easter party.
- Nutty Nests: Mix in chopped nuts, such as almonds or hazelnuts, for added crunch and flavor. This variation adds a sophisticated touch to the classic recipe.
- Fruity Nests: Incorporate dried fruits, such as raisins or apricots, into the mixture for a fruity twist. This adds a chewy texture and a burst of natural sweetness.
Why This Recipe is Perfect for Easter
Chocolate Easter Nests are more than just a treat—they’re a tradition. Here’s why they’re such a hit during the Easter season:
- Kid-Friendly: Kids love helping to make (and eat) these nests. It’s a fun and easy way to get them involved in the kitchen.
- Customizable: You can adapt this recipe to suit your preferences. Use dark chocolate for a richer flavor, or add different toppings for variety.
- Festive and Fun: The nests are a festive addition to any Easter celebration, whether you’re hosting a party or just enjoying a quiet day at home.
- Great for Gifting: Pack these nests in a cute box or bag, and they make a wonderful homemade gift for friends and family.
Frequently Asked Questions (FAQs)
Can I Use Other Cereals?
Absolutely! While cornflakes and rice crispies are traditional, you can experiment with other cereals like shredded wheat, bran flakes, or even crushed biscuits.
How Long Do Chocolate Easter Nests Last?
If stored in an airtight container in a cool place, these nests can last up to a week. However, they’re so delicious, they’ll likely be gone much sooner!
Can I Make These Nests Vegan?
Yes! Simply use dairy-free chocolate and vegan mini eggs to make this recipe vegan-friendly.
How to Make Delicious Chocolate Easter Nests: A Fun and Easy Recipe for the Whole Family
Chocolate Easter Nests are a fun and easy treat to make during the Easter season. These adorable nests are made with melted chocolate, cornflakes (or similar cereal), and topped with mini chocolate eggs. They’re perfect for kids to help with and make a great addition to any Easter celebration. Below is a simple recipe with tips, nutrition information, and detailed timings.
- Prep Time: 25 minutes
- Cook Time: 30 minutes
- Total Time: 55 minutes
Ingredients
- 500g milk cooking chocolate (or dark chocolate if preferred)
- 150g cornflakes or rice crispies (about half a standard packet)
- Mini chocolate eggs (for decoration)
- Optional: shredded coconut + green food colouring (for “grass”)
- Small cupcake cases (about 22)
Instructions
1. Prepare the Coconut “Grass” (Optional)
- If using coconut, add a few drops of green food colouring to shredded coconut in a bowl. Mix vigorously until evenly coloured. Set aside.
Time: 5 minutes
2. Melt the Chocolate
- Break the chocolate into chunks and melt it in a microwave-safe bowl or using a bain-marie (double boiler).
- Microwave method: Heat in 20-30 second intervals, stirring in between, until smooth. Be careful not to overheat, as it can burn the chocolate.
- Bain-marie method: Place the bowl over a pot of simmering water (ensure the bowl doesn’t touch the water) and stir until melted.
Time: 5-10 minutes
3. Mix Chocolate and Cornflakes
- Add the cornflakes to the melted chocolate. Stir gently until all the cornflakes are evenly coated. If the mixture seems too runny, add a few more cornflakes.
Time: 5 minutes
4. Assemble the Nests
- Scoop the chocolate-cornflake mixture into small cupcake cases. Use a spoon to shape a small indent in the center to resemble a nest.
- If using coconut “grass,” sprinkle a little on top of each nest.
Time: 10 minutes
5. Add the Mini Eggs
- Place 2-3 mini chocolate eggs in the center of each nest. If needed, add a small drop of melted chocolate to help secure the eggs in place.
Time: 5 minutes
6. Set the Nests
- Place the nests in the fridge for at least 30 minutes to allow the chocolate to set completely.
Time: 30 minutes (chilling)
Notes
- Chocolate Choice: Use good-quality chocolate for the best flavor. You can mix milk and dark chocolate if desired.
- Cereal Options: Swap cornflakes for rice crispies, shredded wheat, or even crushed biscuits for variety.
- Decorations: Get creative with toppings! Use jelly beans, sprinkles, or edible flowers instead of mini eggs.
- Storage: Keep the nests in an airtight container in the fridge for up to 5 days.
Nutrition
- Calories: 120 kcal per serving
- Sugar: 10g
- Fat: 6g
- Carbohydrates: 15g
- Protein: 2g
Final Thoughts
Making Chocolate Easter Nests is a delightful way to celebrate the season and create lasting memories with your loved ones. This recipe is simple, fun, and yields delicious results that everyone will enjoy. Whether you’re a seasoned baker or a beginner, these nests are sure to impress.