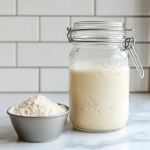
Easy Sourdough Bread Starter: A Step-by-Step Guide for Perfect Homemade Bread
Making your own sourdough starter at home is simple and rewarding! With just flour and water, you can create a natural leaven for fluffy, crusty bread and other delicious sourdough baked goods. This recipe uses a 7-day process to develop a strong, active starter.
Ingredients
Scale
- 700g white all-purpose flour (or whole wheat/rye for a more traditional flavor)
- 700g filtered water
Equipment:
- Medium glass bowl or jar
- Kitchen scale
- Wooden spoon or spatula
- Clean cloth or lid (not airtight)
Instructions
Day 1:
- Mix 50g flour + 50g water in a bowl.
- Stir well, cover loosely, and let sit at room temperature (70-75°F / 21-24°C).
Day 2:
- Add another 50g flour + 50g water to the mixture.
- Stir well, cover, and let sit.
Day 3:
- Discard half of the starter (~100g).
- Add 100g flour + 100g water to the remaining starter.
- Stir, cover, and let sit.
Day 4:
- Discard half of the starter (~150g).
- Add 150g flour + 150g water.
- Stir, cover, and let sit.
(You should see small bubbles and a slightly sour smell!)
Day 5:
- Discard half (~150g).
- Add 150g flour + 150g water.
- Stir, cover, and let sit.
(It should look bubbly like Photo A in the post.)
Day 6:
- Discard half (~200g).
- Add 200g flour + 200g water.
- Stir, cover, and let sit.
(Should resemble Photo B—almost ready!)
Day 7:
- If the starter is doubled in size, bubbly, and smells tangy (like Photo C), it’s ready to use!
- If it’s still sluggish, let it sit one more day before baking.
Notes
- Discarded starter (Days 3-7) isn’t mature enough for baking—just toss it.
- Store in a jar from Day 5 onward for easy monitoring.
- Maintain your starter by feeding it weekly (or refrigerate for longer storage).
Nutrition
- Calories: 50 kcal per serving
- Fat: 0g
- Carbohydrates: 10g
- Protein: 1g
