Easy Sourdough Bread Starter: A Step-by-Step Guide for Perfect Homemade Bread
If you’ve ever dreamed of baking your own fluffy, crusty sourdough bread, the secret lies in a healthy sourdough bread starter. A sourdough bread starter is a simple mixture of flour and water that captures wild yeast and beneficial bacteria, creating the foundation for delicious, naturally leavened bread.
In this comprehensive guide, we’ll walk you through how to make an easy sourdough starter from scratch, maintain it for years, and use it to bake incredible sourdough bread at home.
Why Make a Sourdough Bread Starter?
Before diving into the recipe, let’s explore why a sourdough bread starter is worth the effort:
✅ Natural Fermentation – Unlike commercial yeast, a sourdough starter relies on wild yeast and lactobacilli, which improve digestibility and add complex flavors.
✅ Better Texture & Flavor – Sourdough bread has a chewy crumb and crispy crust, with a slight tang that store-bought bread can’t match.
✅ Longer Shelf Life – The natural acids in sourdough act as preservatives, keeping bread fresh longer.
✅ Health Benefits – Fermentation breaks down gluten and phytic acid, making nutrients more accessible and digestion easier.
Now, let’s get started!
How to Make an Easy Sourdough Starter (Step-by-Step)
Creating a sourdough bread starter takes about 7 days, but the process is simple. All you need is flour and water—no fancy equipment required!
Ingredients
- 700 grams white all-purpose flour (or a mix of whole wheat/rye for a more traditional flavor)
- 700 grams filtered water (chlorine-free for best results)
Equipment
- Glass bowl or jar (non-reactive material)
- Kitchen scale (for precise measurements)
- Wooden spoon or spatula
- Breathable cover (cloth or loose lid)
Day 1: Initial Mix
- In a clean glass bowl, mix:
- 50 grams flour
- 50 grams water
- Stir until smooth.
- Cover loosely and let sit at room temperature (68-75°F) for 24 hours.
🔹 What to Expect: Little to no activity. The mixture will look like thick pancake batter.
Day 2: First Feeding
- Add:
- 50 grams flour
- 50 grams water
- Stir well, cover, and rest another 24 hours.
🔹 What to Expect: Possible small bubbles—this means wild yeast is starting to grow!
Day 3: Discard & Feed
- Discard half of the starter (about 100 grams).
- Add:
- 100 grams flour
- 100 grams water
- Stir, cover, and rest.
🔹 What to Expect: More bubbles and a slightly sour smell.
Day 4: Increased Activity
- Discard half of the starter.
- Add:
- 150 grams flour
- 150 grams water
- Stir, cover, and rest.
🔹 What to Expect: The starter should be bubbly and smell tangy.
Day 5: Almost Ready!
- Discard half of the starter.
- Add:
- 150 grams flour
- 150 grams water
- Stir, cover, and rest.
🔹 What to Expect: The starter should double in size within 4-6 hours—this means it’s active!
Day 6: Final Feeding Before Use
- Discard half of the starter.
- Add:
- 200 grams flour
- 200 grams water
- Stir, cover, and rest.
🔹 What to Expect: The starter should be very bubbly and have a pleasant sour aroma.
Day 7: Is Your Sourdough Starter Ready?
Your sourdough bread starter is ready if:
✔ It doubles in size within 4-6 hours after feeding.
✔ It has a frothy, bubbly surface.
✔ It smells yeasty and slightly sour (not rotten).
If it’s not quite there, repeat Day 6’s feeding and wait another 24 hours.
The Science Behind Sourdough Starter Fermentation
A sourdough bread starter is more than just flour and water—it’s a living ecosystem of wild yeast and lactic acid bacteria (LAB). Understanding the science behind fermentation helps you maintain a healthy starter and achieve the best sourdough bread.
How Wild Yeast and Bacteria Work Together
When you mix flour and water, natural microorganisms from the environment (and the flour itself) begin to grow. The two key players are:
- Wild Yeast (Saccharomyces exiguus, Candida milleri, etc.) – These yeasts thrive in acidic environments and produce carbon dioxide, which makes bread rise.
- Lactic Acid Bacteria (Lactobacillus spp.) – These bacteria convert sugars into lactic and acetic acid, giving sourdough its tangy flavor and acting as a natural preservative.
Unlike commercial yeast, which works quickly, sourdough fermentation is slower, allowing for deeper flavor development and better gluten breakdown.
The Role of pH in Sourdough Starter
A healthy sourdough starter has a pH between 3.5 and 4.5, making it slightly acidic. This acidity:
✔ Prevents harmful bacteria from growing.
✔ Strengthens gluten, improving dough elasticity.
✔ Enhances flavor with a balanced sourness.
If your starter smells too vinegary or unpleasant, it may be too acidic. A quick fix is to feed it more frequently with fresh flour and water.
Temperature’s Impact on Fermentation
- Warmer temps (75-85°F) → Faster fermentation, more sour flavor.
- Cooler temps (60-70°F) → Slower rise, milder taste.
For consistency, keep your starter in a stable environment, like a turned-off oven with the light on or a proofing box.
By understanding these microbial processes, you can troubleshoot issues and optimize your sourdough bread starter for the best results.
How to Store and Maintain Your Sourdough Starter Long-Term
Once you’ve created a healthy sourdough starter, keeping it alive requires minimal effort—if you follow the right storage methods.
Option 1: Room Temperature Storage (For Daily Bakers)
If you bake several times a week, keep your starter at room temperature (68-75°F).
🔹 Feeding Schedule:
- Daily feedings (discard half, add equal parts flour & water).
- Use a clean jar to prevent mold.
- Stir well to incorporate oxygen, which helps yeast thrive.
🔹 Signs of a Healthy Starter:
✔ Doubles in size within 4-6 hours after feeding.
✔ Bubbly texture with a sweet-tangy aroma.
Option 2: Refrigerator Storage (For Occasional Bakers)
If you bake once a week or less, refrigerate your starter to slow fermentation.
🔹 Feeding Before Storing:
- Feed as usual (1:1:1 ratio of starter, flour, water).
- Let it sit at room temp 1-2 hours (to activate).
- Seal and refrigerate.
🔹 Weekly Maintenance:
- Take out the starter, discard half, and feed.
- Let it rest 4-12 hours at room temp before baking.
Reviving a Neglected Starter
If your starter has been in the fridge for weeks without feeding:
- Discard all but 1 tablespoon.
- Feed with 25g flour + 25g water.
- Repeat every 12 hours until bubbly again.
With these storage tips, your sourdough bread starter can last for years—ready whenever you are!
Creative Uses for Sourdough Discard (No Waste!)
Many bakers hate throwing away sourdough discard during feedings. Luckily, it’s packed with flavor and can be used in dozens of recipes!
Why Use Sourdough Discard?
- Adds a subtle tang and extra moisture to baked goods.
- Enhances texture (softer crumb, crispier crust).
- Reduces food waste—no more guilt!
Top 5 Sourdough Discard Recipes
- Sourdough Pancakes
- Mix 1 cup discard with 1 egg, 1 tbsp sugar, ½ tsp baking soda.
- Cook like regular pancakes—fluffier and tastier!
- Sourdough Crackers
- Combine 1 cup discard, ¼ cup melted butter, 1 tsp salt, herbs.
- Roll thin, bake at 350°F until crispy (~15 min).
- Sourdough Banana Bread
- Replace ½ cup flour in your recipe with sourdough discard.
- Adds moisture and a slight tang.
- Sourdough Pizza Dough
- Use ½ cup discard in place of some flour in your dough.
- Ferment overnight for extra flavor.
- Sourdough Chocolate Cake
- The acidity in discard enhances cocoa flavor.
- Substitute ¼ cup discard for milk in cake recipes.
Storing Discard for Later Use
- Keep in a sealed jar in the fridge for up to 1 week.
- Freeze in ice cube trays for longer storage.
With these ideas, you’ll never waste sourdough discard again—just delicious, creative baking!
How to Maintain Your Sourdough Bread Starter
Once your starter is active, you’ll need to keep it healthy for future baking. Here’s how:
Room Temperature Maintenance (For Frequent Baking)
- Feed daily: Discard half and add equal parts flour & water.
- Keep at 70-75°F for consistent activity.
Refrigerator Storage (For Occasional Baking)
- Feed the starter, let it sit 1-2 hours, then refrigerate.
- Feed weekly: Take out, discard half, feed, and return to the fridge.
🔹 Reviving a Cold Starter: If stored in the fridge, let it sit at room temp for 4-12 hours and feed before baking.
Best Flour for Sourdough Starter
The type of flour you use affects flavor and activity:
- All-purpose flour: Mild flavor, great for beginners.
- Whole wheat/rye flour: Ferments faster, adds depth.
- Unbleached flour: Preserves natural yeast better.
💡 Pro Tip: For the best results, use King Arthur Flour (affiliate link)—it’s high-quality and reliable.
Troubleshooting Common Sourdough Starter Problems
1. My Starter Isn’t Bubbling
- Possible Cause: Cold environment, inactive yeast.
- Fix: Move to a warmer spot (75°F) or try whole wheat flour.
2. It Smells Like Alcohol or Vinegar
- Possible Cause: Hungry starter (needs feeding).
- Fix: Discard most and feed every 12 hours for 2 days.
3. There’s a Liquid Layer (Hooch) on Top
- Possible Cause: Over-fermentation.
- Fix: Stir it in or pour off, then feed.
What to Bake with Your Sourdough Starter
Now that your sourdough bread starter is ready, try these delicious recipes:
🍞 Classic Sourdough Bread – Fluffy inside, crispy crust.
🥖 Sourdough Baguettes – Perfect for sandwiches.
🥯 Sourdough Bagels – Chewy and flavorful.
🥨 Sourdough Pretzels – Great for snacking.
🍪 Sourdough Discard Recipes – Don’t waste the discard! Make pancakes, crackers, or waffles.
Easy Sourdough Bread Starter: A Step-by-Step Guide for Perfect Homemade Bread
Making your own sourdough starter at home is simple and rewarding! With just flour and water, you can create a natural leaven for fluffy, crusty bread and other delicious sourdough baked goods. This recipe uses a 7-day process to develop a strong, active starter.
Ingredients
- 700g white all-purpose flour (or whole wheat/rye for a more traditional flavor)
- 700g filtered water
Equipment:
- Medium glass bowl or jar
- Kitchen scale
- Wooden spoon or spatula
- Clean cloth or lid (not airtight)
Instructions
Day 1:
- Mix 50g flour + 50g water in a bowl.
- Stir well, cover loosely, and let sit at room temperature (70-75°F / 21-24°C).
Day 2:
- Add another 50g flour + 50g water to the mixture.
- Stir well, cover, and let sit.
Day 3:
- Discard half of the starter (~100g).
- Add 100g flour + 100g water to the remaining starter.
- Stir, cover, and let sit.
Day 4:
- Discard half of the starter (~150g).
- Add 150g flour + 150g water.
- Stir, cover, and let sit.
(You should see small bubbles and a slightly sour smell!)
Day 5:
- Discard half (~150g).
- Add 150g flour + 150g water.
- Stir, cover, and let sit.
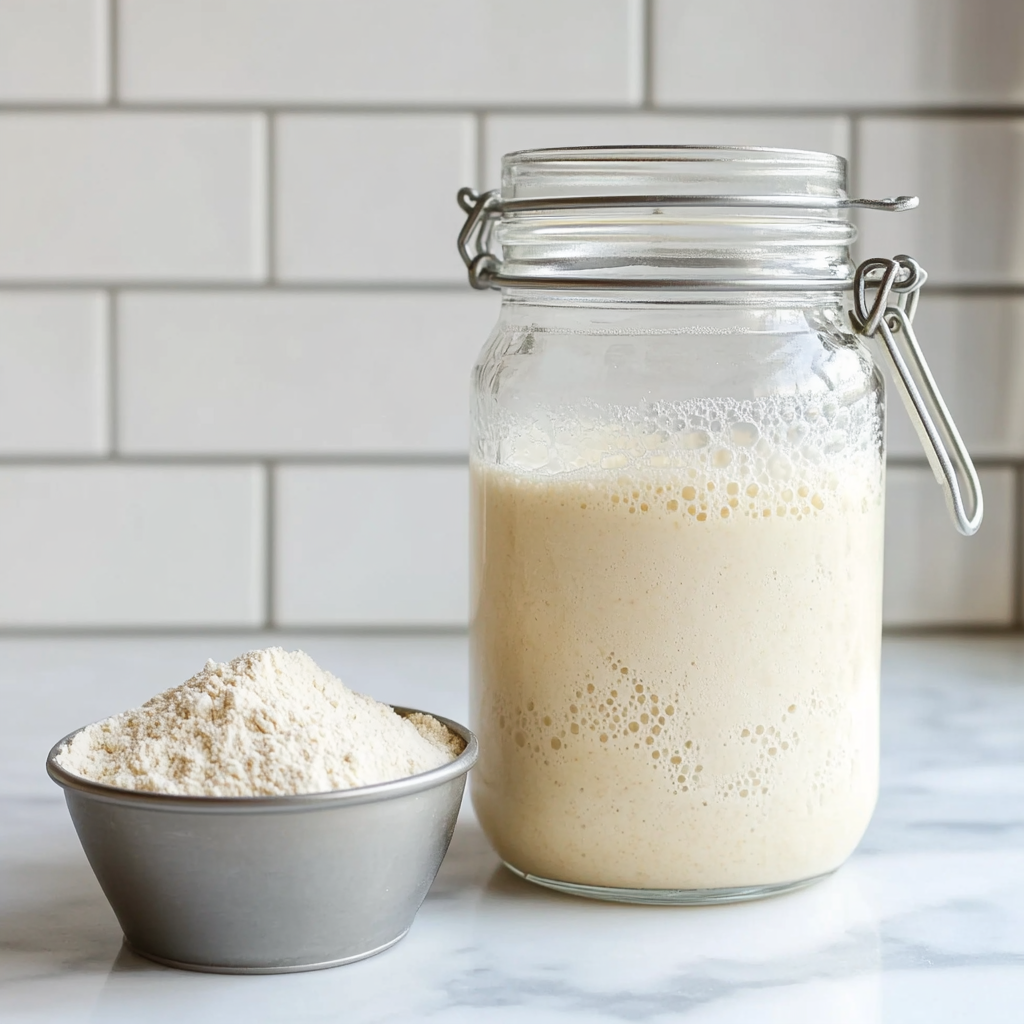
(It should look bubbly like Photo A in the post.)
Day 6:
- Discard half (~200g).
- Add 200g flour + 200g water.
- Stir, cover, and let sit.
(Should resemble Photo B—almost ready!)
Day 7:
- If the starter is doubled in size, bubbly, and smells tangy (like Photo C), it’s ready to use!
- If it’s still sluggish, let it sit one more day before baking.
Notes
- Discarded starter (Days 3-7) isn’t mature enough for baking—just toss it.
- Store in a jar from Day 5 onward for easy monitoring.
- Maintain your starter by feeding it weekly (or refrigerate for longer storage).
Nutrition
- Calories: 50 kcal per serving
- Fat: 0g
- Carbohydrates: 10g
- Protein: 1g
Final Thoughts
Creating a sourdough bread starter is a rewarding process that unlocks a world of artisan baking at home. With just flour and water, you can cultivate a living culture that lasts for years—providing endless loaves of delicious, homemade sourdough bread.