
Rice Krispie Nests: The Perfect Easter Treat for Spring
When it comes to Easter desserts or fun springtime treats, Rice Krispie Nests are a classic favorite that never goes out of style. These adorable, bite-sized treats are not only easy to make but also a fantastic activity to enjoy with kids. Whether you’re hosting an Easter brunch, planning a spring party, or simply looking for a delightful snack, these nests are sure to impress. In this post, we’ll walk you through everything you need to know about making Rice Krispie Nests, from the ingredients and step-by-step instructions to tips, storage, and nutritional information.
Why You’ll Love Rice Krispie Nests
Rice Krispie Nests are the ultimate combination of simplicity and creativity. Here’s why they’re a must-try:
- Easy to Make: With just a few basic ingredients and minimal prep time, these nests come together in no time.
- Kid-Friendly: Kids love helping with the process, from mixing the ingredients to shaping the nests and adding the finishing touches.
- Customizable: You can personalize these nests with different types of candy eggs or decorations to match your theme.
- Perfect for Any Occasion: While they’re ideal for Easter, these nests are also great for spring parties, baby showers, or even as a fun after-school snack.
Ingredients for Rice Krispie Nests
To make Rice Krispie Nests, you’ll need the following ingredients:
- 3 Tablespoons butter: Adds richness and helps bind the mixture.
- 10 ounces miniature marshmallows (about 6 cups): The key ingredient for that gooey, sticky texture.
- 6 cups Rice Krispie cereal: The star of the show, providing the signature crunch.
- 1 package (1 ounce) chocolate eggs or jelly beans: For the “eggs” in the nests.
- Non-stick spray: To prevent sticking when shaping the nests.
Step-by-Step Instructions
Follow these simple steps to create your Rice Krispie Nests:
1. Prepare Your Muffin Tins
Start by coating 2 muffin tins with non-stick spray. This will ensure that your nests come out easily once they’ve set. Set the tins aside.
2. Melt the Butter and Marshmallows
In a large pot, melt the butter over medium heat. Once the butter is fully melted, add the miniature marshmallows. Stir continuously until the marshmallows are completely melted and the mixture is smooth.
3. Add the Rice Krispie Cereal
Remove the pot from the heat and pour in the Rice Krispie cereal. Gently stir until the cereal is evenly coated with the marshmallow mixture. Be careful not to overmix, as this can make the treats too dense.
4. Shape the Nests
Working quickly, press the mixture into the cups of the muffin tin. Use your fingers or the back of a spoon to create an indentation in the center of each cup, forming the “nest” shape. If the mixture is too sticky, lightly grease your hands with non-stick spray.
5. Let the Nests Set
Allow the nests to set at room temperature for about 20 minutes. This will give them time to firm up and hold their shape.
6. Add the Finishing Touches
Once the nests have set, carefully remove them from the muffin tin. Place a few chocolate eggs or jelly beans in the center of each nest to complete the look.
The History of Rice Krispie Treats and Their Evolution into Nests
Rice Krispie Treats have been a beloved snack for generations, but have you ever wondered how they evolved into the adorable Rice Krispie Nests we know today? The story begins in the 1930s when Mildred Day, a home economist working for Kellogg’s, created the original Rice Krispie Treats recipe. These treats quickly became a hit due to their simplicity, affordability, and irresistible taste. Made with just three ingredients – Rice Krispie cereal, marshmallows, and butter – they were a staple at bake sales, school parties, and family gatherings.
Over the years, creative bakers began experimenting with the classic recipe, shaping the treats into various forms to suit different occasions. The idea of turning them into Rice Krispie Nests likely emerged as a fun way to celebrate Easter and springtime. By pressing the mixture into muffin tins and adding candy eggs, these nests became a festive and visually appealing treat. The concept perfectly captures the spirit of the season, symbolizing new life and renewal.
Today, Rice Krispie Nests are a popular choice for Easter celebrations, spring parties, and even baby showers. Their versatility and ease of preparation make them a go-to recipe for busy parents and party planners. Whether you stick to the classic version or experiment with creative variations, these nests are a testament to the enduring appeal of Rice Krispie Treats and their ability to adapt to changing trends and tastes.
Tips for Making Perfect Rice Krispie Nests Every Time
Creating Rice Krispie Nests may seem simple, but a few tips and tricks can ensure they turn out perfectly every time. First and foremost, it’s essential to work quickly once the marshmallow mixture is ready. The melted marshmallows and cereal mixture hardens fast, so having your muffin tins prepared and your tools ready is crucial. Lightly greasing your hands with non-stick spray or butter can make shaping the nests much easier, as the mixture can be quite sticky.
Another key tip is to use fresh ingredients. Stale marshmallows or cereal can affect the texture and flavor of your nests. If you’re using miniature marshmallows, they melt faster and more evenly than regular-sized ones, making them the preferred choice for this recipe. However, if you only have large marshmallows on hand, simply cut them into smaller pieces before melting.
When pressing the mixture into the muffin tins, aim for an even distribution to ensure all the nests are the same size. Creating a deep indentation in the center of each nest will give you plenty of space to add your candy eggs or other decorations. If you’re making these nests with kids, consider setting up a decorating station with different types of candy and sprinkles to let their creativity shine.
Finally, don’t be afraid to experiment with flavors and colors. Adding a few drops of food coloring to the marshmallow mixture can create pastel-colored nests that are perfect for spring. You can also mix in cocoa powder or peanut butter for a unique twist. With these tips in mind, you’ll be able to create Rice Krispie Nests that are not only delicious but also visually stunning.
Creative Variations of Rice Krispie Nests for Every Occasion
While the classic Rice Krispie Nests are always a hit, there are countless ways to customize them for different occasions and preferences. For a chocolate lover’s twist, try adding 1/4 cup of cocoa powder to the marshmallow mixture. This creates a rich, chocolatey base that pairs perfectly with the candy eggs. You can also drizzle melted chocolate over the finished nests for an extra indulgent touch.
If you’re hosting a spring-themed party, consider using pastel-colored marshmallows or adding a few drops of food coloring to the mixture. This creates vibrant, festive nests that are sure to impress your guests. For a nutty flavor, mix in 1/4 cup of peanut butter or almond butter. This not only adds a delicious twist but also provides a bit of extra protein.
For those with dietary restrictions, it’s easy to make gluten-free or vegan Rice Krispie Nests. Simply use gluten-free Rice Krispie cereal and ensure your marshmallows are vegan-friendly (many brands now offer plant-based options). You can also substitute the butter with a vegan alternative like coconut oil.
If you’re making these nests for a non-Easter occasion, such as a baby shower or birthday party, swap out the candy eggs for other small treats like M&M’s, jelly beans, or even fresh berries. You can also use cookie cutters to shape the nests into different forms, such as flowers or stars, to match your theme.
Storage and Shelf Life
Rice Krispie Nests are best enjoyed fresh, but they can be stored for later. Here’s how:
- Room Temperature: Store the nests in an airtight container at room temperature for up to 4 days.
- Avoid Humidity: Keep them away from humid environments, as this can cause the cereal to lose its crunch.
- Freezing: While it’s not recommended to freeze these treats, you can prepare the mixture ahead of time and shape the nests just before serving.
Nutritional Information
Here’s a breakdown of the nutritional content per serving (1 nest):
- Calories: 150kcal
- Carbohydrates: 28g
- Protein: 2g
- Fat: 4g
- Saturated Fat: 3g
- Polyunsaturated Fat: 0.1g
- Monounsaturated Fat: 1g
- Trans Fat: 0.1g
- Cholesterol: 5mg
- Sodium: 76mg
- Potassium: 43mg
- Fiber: 0.05g
- Sugar: 16g
- Vitamin A: 611IU
- Vitamin C: 5mg
- Calcium: 21mg
- Iron: 3mg
Fun Variations to Try
While the classic Rice Krispie Nests are always a hit, you can experiment with different flavors and decorations to keep things exciting:
- Chocolate Nests: Add 1/4 cup of cocoa powder to the marshmallow mixture for a chocolatey twist.
- Peanut Butter Nests: Mix in 1/4 cup of peanut butter for a nutty flavor.
- Colorful Nests: Use pastel-colored marshmallows or add a few drops of food coloring to the mixture for a festive look.
- Gluten-Free Option: Ensure your Rice Krispie cereal is gluten-free if needed.
Frequently Asked Questions
Can I Use Regular Marshmallows Instead of Miniature Ones?
Yes, you can use regular marshmallows. Simply cut them into smaller pieces to help them melt more evenly.
How Do I Prevent the Nests from Sticking to the Muffin Tin?
Be sure to generously coat the muffin tin with non-stick spray. You can also use cupcake liners for easier removal.
Can I Make These Nests Ahead of Time?
Yes, you can prepare the nests a day in advance. Store them in an airtight container and add the candy eggs just before serving.
What Can I Use Instead of Chocolate Eggs?
You can use jelly beans, M&M’s, or any other small candies that fit the nest theme.
Rice Krispie Nests: The Perfect Easter Treat for Spring
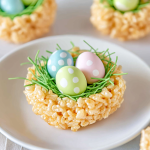
Looking for a fun and festive treat to make this Spring or Easter? These adorable Rice Krispie Nests are perfect for the occasion! They’re easy to prepare, kid-friendly, and absolutely delicious. With a crispy, chewy base and cute mini eggs nestled on top, these treats are sure to be a hit with everyone. Plus, they’re quick to make and require just a few simple ingredients. Let’s get started!
- Prep Time: 20 minutes
- Cook Time: 20 minutes
- Total Time: 40 minutes
Ingredients
- 3 tablespoons butter
- 10 ounces miniature marshmallows (about 6 cups)
- 6 cups Rice Krispie cereal
- 60 mini chocolate eggs (or jelly beans for a variation)
- Optional: green-colored coconut or frosting for “grass”
Instructions
- Prepare the Pan:
Coat 2 muffin tins with non-stick cooking spray and set aside. - Melt the Butter and Marshmallows:
In a large pot, melt the butter over medium heat. Add the marshmallows and stir continuously until completely melted and smooth. - Mix in the Cereal:
Remove the pot from heat and pour in the Rice Krispie cereal. Gently stir until the cereal is evenly coated with the marshmallow mixture. - Form the Nests:
Working quickly, press the mixture into the muffin tin cups. Use your fingers or the back of a spoon to create an indentation in the center of each cup to form the “nest” shape. - Set the Nests:
Allow the nests to cool and set for about 20 minutes. Once firm, carefully remove them from the muffin tin. - Decorate:
Add a small amount of green-colored coconut or frosting to each nest to resemble grass. Place 3 mini chocolate eggs in the center of each nest.
Notes
- Grease Your Hands: Lightly coat your hands with cooking spray or butter to prevent the mixture from sticking while shaping the nests.
- Work Quickly: The marshmallow mixture hardens fast, so shape the nests as soon as possible after mixing.
- Storage: Store the nests in an airtight container at room temperature for up to 4 days.
Nutrition
- Calories: 150kcal Per Nest
- Sugar: 16g
- Sodium: 76mg
- Fat: 4g
- Saturated Fat: 3g
- Carbohydrates: 28g
- Protein: 2g
- Cholesterol: 5mg
Final Thoughts
Rice Krispie Nests are a delightful treat that combines simplicity, creativity, and deliciousness. Whether you’re making them for Easter, a spring party, or just because, they’re sure to bring smiles to everyone’s faces. With their crunchy texture, gooey marshmallow base, and cute candy eggs, these nests are a timeless favorite that both kids and adults will love.